Tuesday, January 13, 2015

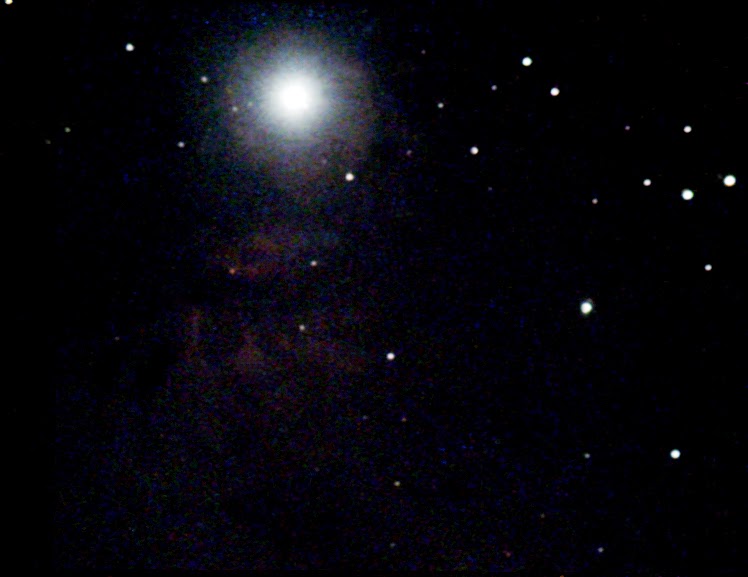
Yet another lovely Christmas Comet courtesy of Rev Lovejoy..its becoming a habit

The last few Christmas's have been a blast for comet watchers the world over. Seems like bright naked eye comets are drawn to the time of the year when Christ was born. In fact there have been theories that the star of Bethleham might have actually been a comet, guiding the three wise men to the spot where Jesus was born. In any case, call it coincidence or call it fact, the last few years have heralded rather spectacular dirty snowballs to our inner solar system (Lovejoy the year before, Lovejoy and ISON last year and Lovejoy this year). Dim periodic comets are a dime a dozen, and every year many can be spotted with large amateur telescopes. However comets that breach the naked eye barrier (i.e. magnitude 6 and above) are rarer. That is why this is particularly heartening to see.


Anyways, as with all comets, the main aim of most amateurs is to firstly spot the comet, see if it is visible with the naked eye, sketch and shoot the comet. My mission was no different. After hearing news about this celestial visitor, I decided to see it for myself. My first look came the week after Christmas. Weather has been wet since we moved to NorCal. My first clear sky break came two days before Christmas (see Saratoga Gap run report). The comet was already visible, but rather low in the sky. At that time it was just south of Canis Major in the constellation of Puppis. Due to the elevation, I did not bother searching for it while I was at Saratoga Gap. My first look at this comet would come about a week later, on the eve of the eve of new years day. Cracking open the door to the yard, I poked my SkyScanner out to spot the huge fuzzball. While not visible with the naked eye from red zone skies, the comet was plenty bright in my SkyScanner. I also took a sneek peek with the C6. My notes, nice sharp core, very hazy and large coma, similar to another Comet Holmes in 2007. My next plan was to get some CCD images of this lovely tailess comet (well there was a tail, just a very faint one that is not visible to the naked eye).


Fast forward to a week after. The moon was slightly past full now, but still hanging around the evening sky to make a nuisance of itself. I made sure the moon was still hidden behind a wall when I went ahead and image the comet, now found just to the right of Rigel, at the foot of Orion the hunter. The comet seemed even bigger and brighter, but still not naked eye from my red zone, and with no tail. The comet was harder to image than expected as the coma was just so big and bright. My multiple stack exposure above 6 subs (30 seconds each) just over exposed the nuclear and coma region. I settled for about 4 subs. Will have to try again from darker skies as the moon departs the evening sky. Stay tuned..but for now enjoy these images of Comet Lovejoy Q2!

Another new beginning...observing at Saratoga Gap, NorCal 23rd December 2014

Seems like a tradition now to spend a dark sky getaway on the eve of the eve of Christmas. This time round, thing were slightly different. Well for one I am no longer observing from my fave site away from home at Solstice Canyon in Malibu. I have been observing from orange zone Malibu since it was introduced to me by a now old friend of mine, Terry Nakazono back in 2011. Has it been that long? I have had some very memorable observation sessions from that site. Even started my imaging craze there.

"M93 Open Cluster, Puppis"

But the winds of change were blowing once again. In my case , it has been far too often. I am not one for change and just hate having to start over. Good thing our friend's over here in NorCal are familliar with the local surrounds. My original plans were to observe from Gilroy, close to my other close family friend's home. This site is in the orange zone but is situated on a bluff right above suburban homes, so while it was plenty dark, there were still light filtering in from the homes earlier in the night. Not the most ideal imaging site (visual it is really good though...see older post!). The suggested site had many things going for it. Firstly it was only 11 miles out from where I was. The drive there would only take between 20 to 23 minutes seeing that I will be driving up a ridge.

"NGC 1973, The Running Man in Orion"

Secondly the elevation. Unlike Solstice Canyon which was at sea level, this site is situated about 3000 feet above sea level. That means, theoretically anyway, the skies should be better as you are looking through less atmosphere. Of course all these would be meaningless if the site was not clear around the horizon and the area unsafe. Turns out the parking lot at Saratoga Gap was similar to what I experienced at my Mount Pinos site, just with less pine trees ringing the parking lot, less elevation, orange zone skies and a much shorter drive. And the skies were on par, if not better than what I got at Malibu. Gone was the glow towards the east from downtown LA. Skies all around were plenty dark. Looks like its all systems go.

"NGC 2261, Hubble Variable Nebula in Monoceros"

I did not really have a whole heap of objects to image since I just bagged most of the ones I wanted to image in my final two sessions at Solstice Canyon in Malibu. The next imaging window would be when the galaxy fields in the Coma-Virgo region rise, later in the year. I have quite a number of bright and not so bright galaxies on my to image list with my new/old Meade DSI II OSC. That said I still endeavored to make a short list, and came up with objects mostly in Monoceros, since this is one of the constellations I pretty much ignored in my past sessions. I had on my list the rather large and faint Rosette Nebula and its embedded cluster, Hubble Variable Nebula (NGC 2261), which believe it or not, I have never bothered hunting down...don't ask me why. I also had the Christmas Tree Cluster (NGC 2264) in Monoceros on my list (yes I know its the season right?). To these I added southern open cluster M93 in Puppis and a galaxy in Aries the Ram (NGC 772).

"NGC 2264, Christmas Tree Cluster in Monoceros"

I also wanted to spend some time doing visual with my C8, and that is precisely what I did after completing my short imaging run of the few objects I mentioned in the last paragraph. The views in the C8 is definitely comparable to the bright views I got in my 10" GS dob. The only difference is the narrower FOV as the C8 has a much longer focal length 2000mm versus the 1250mm on the dob. This will soon be remedied with a longer focal length eyepiece in the 2" range. I had two eyepieces in mind, the Orion WideView 42mm 3 element and the Orion 38mm SWF Q70 degree 5 element. The latter was on backorder and might not make it in time for the current accessory sale they have on ($20 off each eyepiece...big savings), which only applies to "in stock" items. I weighed the pros and cons and decided to bite the bullet and get the 3 element 42mm WideView. While the FOV is much narrower at 52 degrees, there is less glass in this eyepiece, and from experience with simpler eyepiece versus their more expensive wide-field exotic brethren, the ones with less elements usually give up a much brighter view, at the expense of the FOV. Oh well will have to test it out and write-up another observing report.

"Rosette Nebula and open cluster NGC 2244 in Monoceros"

Spent the next two hours perusing the winter milky way, and some fall objects. Started off with M31 in Andromeda and its companions (M32 was sooo bright!!!), which were setting to the west; M42 (rusted hues detected in the outer parts of the nebula, with the main area appearing an intense green) and its surrounds (yup Flame Nebula was visible, with the dark streaks running through it, and M78 was nice and defined). Hubble Variable Nebula was a bright wedge shaped nebulosity. Also spent some time looking at galaxies in Leo and Ursa Major. All the major galaxies show some sort of detail through a scope as large as an 8". The standout for me is M82 in Ursa Major, with some intense mottling along its body, and dark lanes crisscrossing the galaxy. M65 and M66 also showed some detail at higher magnification, as did planetaries M97, the Owl Nebula and M76, the little dumbbell nebula. Used the OIII filter for the latter two and they looked really bright. Finished off the night with a nice long look at old jove through the C8. So much detail in the cloud surface! I really do enjoy the whole sit down and observe experience, much more comfortable than bending over and observing through my awkward height 10" dob!

So overall it was a very enjoyable session and I hope to have more of these in the future. Watch this space...next change Comet Lovejoy Q2 and the realm of galaxies!


Saturday, November 1, 2014

Urban Warriors: How I Conquered White Zone Imaging

"NGC869 and 884, The Double Cluster in Perseus. Open clusters are the best objects for urban imaging. 4x30sec exposure"

I am an urban warrior. Repeat again I am an urban warrior. Yes I am an urban warrior, as in urban imaging (don't worry I am not going out to kill zombies or slay some demons). I have had limited success up until now CCD imaging from my white zone playground/observation spot. Not sure if this is due to me having more experience under my belt imaging and processing, or owning a slightly better camera, or just having the knowledge to select more suitable objects, but I have been getting very encouraging results of late, even with dimmer fare. Imaging from my white zone observing site makes heaps of sense since I do most of my observing from home anyways, seeing I only get the chance to get out to dark skies once a month! That way I can add to my tally of imaged objects and still have a rollicking good time under less than ideal skies. An added plus is I save on fuel and I don't need to pack the car! Its amazing what you can pull out of the muck when you use the right gear.

Battle Gear for the Urban Warrior

"M76, The Little Dumbbell Planetary from my light drenched playground. 10x30sec exposure"

The "gear" is not all that different from what I would employ under darker skies. My imaging arsenal is composed of a GOTO telescope, SkyGlow light pollution filter, 0.5x focal reducer (if I am using the longer focal length OTA for imaging), CCD camera and a laptop. I use the 70mm Travelscope these days as it just offers a much wider canvass to paint on, plus I can expose for longer without trailing (as mentioned in my previous blog I can expose for up to 42 seconds). The mount is still the same old Celestron NexStar GOTO mount that used to hold the 102 mm f/10 refractor (which I still use for smaller objects such a globulars and planetaries). My camera is now the next CCD cam up from my previous cam. I now use a Meade DSI II OSC with a larger CCD chip (752x582 pixels-437,664 pixels almost double the previous one), and it has heaps lower, if any amp glow. As such I have had an intense urge to re-image most of the objects I did with the smaller CCD cam. In short the final product is just more prettier! I employ a Orion SkyGlow Broadband filter when I do my imaging from suburbia. This visual filter knocks down light pollution sufficiently for me to get good images even of galaxies! Another plus is it seems to remove that annoying purple halo around brighter stars from chromatic aberration.

Choices Choices.....

"NGC891, The Outer Limits Galaxy in Andromeda from a white zone no less. Yes it is imageable. 15x30sec exposure"

This is one of the most critical components for success if one wants to get good deep sky images from suburbia, especially if you, like me have a limited amount of equipment. Astronomers with deeper wallets have been getting excellent results even from the city. With accurate tracking mounts, large image sensor CCD camera's (mostly black and white as those are more sensitive!), APO scopes (to banish chromatic aberration) and the use of various narrowband filters, some of these astronomers have been turning up world class images of all manner of deep sky objects rivaling even large observatories!

"M37, Open Cluster in Auriga, 6x30sec. Open Clusters are easy from light polluted skies"

In my case, I stick to mostly brighter objects that can be captured with very short exposures. The trick is to get multiple subs. These days I collect the subs and save them separately (in the past I let the Meade capture software Envisage do the work...but most times this does not work out too well after 6 of more subs). The objects I usually target are open clusters, brighter nebulae (and smaller planetary nebulae as they have very high surface brightness). I leave the galaxies and fainter nebulae for my dark sky jaunts. That said, there are exceptions to the rule. Some of the fainter fare can be imaged with a little patience. The only problem I face with these is the grainy background. The images are almost exclusively better from dark sky sites so whenever possible, I still reserve most of the fainter stuff for my dark sky jaunts!

Post-Processing Magic

"M42, The Orion Nebula in Orion. My best image of this huge nebula complex so far...and this came from white zone imaging. 15x30sec"

The title says it all. This is where the real magic happens. Most of the dimmer fare will not be visible in single frames. That's where good GOTO comes into play, since some of these objects might not even be visible in the scope (Especially from suburban sites. From dark sky sites this is not so much of a problem as you can check to see if the object is in frame!). The secret here is to stack multiple subs. As mentioned in the previous paragraph, I used to let Envisage handle this, prior to discovering MaxIM DL. While it does a decent job, most times the stacks goes wonky after 6 subs. I am currently doing anywhere between 6 and 20 subs at 30 to 42 second exposures each and then stack them afterwards in MaxIM DL. This post-processing software works like a charm! All you have to do is open the images you want to work with, hit the combine button, select the images you want then manually select two stars you want to use as point of alignment. You scroll through the images to mark the alignment stars (alignment star one on all selected images, then alignment star two). You have the option of discarding subpar images. MaxIM DL also has a histogram function to stretch the image but I prefer to use Photoshop (PS) for this. I save the files as 16-bit TIFF's. While not as good as FITS, this image file format has a good enough dynamic range to allow stretching of the histogram to bring out the fainter portions of the object. Besides PS does not work with FITS file format, and this is what I use for all my image manipulation. In summary I apply dark frames, clean up image noise using clone stamp tool, use the curves function to bring up detail and levels dropper tool to adjust the background to noise ratio and color balance.

"NGC2024, The Flame Nebula in Orion, another example of a dim but imageable object from bright skies. 20x30sec"

With this I can get pretty pictures even from my light drenched playground. I let the images here speak for themselves!

Monday, October 27, 2014

Imaging ghostly wraiths from Solstice Canyon Malibu


I have been neglecting my blog. I know its bad and I feel guilty. I have taken to writing articles for Info Barrel and just could not stop the torrent of writing inspiration I have been having of late (I have no clue why I have been so inspired. It seems like everytime I sit at my computer, I am compelled to write. Maybe this is not such a bad thing lol). So I figured it was about damn time I started doing some updates for my blog. I have been keeping busy since the last observing blog (observing from Gilroy), mostly with imaging from Solstice Canyon in Malibu, and also from suburbia. I will probably do another spotlight on imaging from urban settings now that I have a handle on good objects to image from suburbia, but for now here is my blog on imaging dim fare from Solstice Canyon!

The need for faint photons


"NGC 6960 Western Veil Nebula, Cygnus"

It has been a while coming back to imaging the Veil, but as they say patience is virtue. My successes with imaging dimmer objects over the past couple of months have been very encouraging, so much so I decided to go for objects such as the Helix Nebula (NGC 7293) in Aquarius, the Veil Nebula (Western Veil NGC 6960 and Eastern Veil NGC 6992) and the Crescent Nebula (NGC 6888) in Cygnus. This blog is all about my exploits in bagging these harder objects. Seeing how I have had limited success imaging with the Orion SkyGlow filter and the Meade DSI CCD from light polluted skies, I figured I stand the best chance of success imaging from the darker suburban skies at Solstice Canyon, my usual imaging site. This site, although not the best, does provide sufficiently dark skies for me and my scope to not have to worry about using the SkyGlow filter. Another plus point is that since I am imaging in the canyon, wind is not much of a problem in comparison to imaging from say Mount Pinos and Lockwood Valley. Both the latter offer much darker skies, but due to their elevation (over 8000 feet above sea level), wind is a constant problem, even with subs as short as 30 seconds. Since it was the new moon weekend, I decided there and then that I was going to head out, even with the rather discouraging weather reports. Both weather.com and accuweather.com gave the same prediction, partially clear with clouds covering a good proportion of the skies. Fortunately for me I ignored this and went anyway. Made two trips out to Solstice Canyon since my last blog and both conditions were similar, dismal weather forecast but excellent skies on both trips out. The moral of the story is only trust Clear Sky Chart!


"NGC 6992 Eastern Veil Nebula, Cygnus"

Anyways I stuck to my usual routine on both trips out. Leave home about 9.30pm...get there about 10pm, setup the scope and then start my session by checking the GOTO accuracy. On both trips I had with me my 70mm Travelscope OTA mounted on NexStar GOTO mount. I found this combo to be a killer imaging setup since the views are wider, and I can expose for longer (up to 42 seconds without trailing). The only drawback is I cannot reduce the focal length further as the scope does not come to focus with the Orion 0.5x focal reducer. Oh well no worries there. I can also safely say that the images I am getting with the Meade DSI II OSC are heaps better than what I was getting with the original Meade DSI I. The amp glow on the top right corner seems to be all but eliminated, and the spurious color pixels are kept to a minimum, provided the sensor temperature (Envisage gives you a real time readout...neat!) is at 12 C or lower. With this, I have been systematically re-imaging some of the better and brighter objects that were done previously with the Meade DSI I (among these M8, M20, M22, M4, M11, M16, M17 are you seeing a trend here...yup summertime DSO's before they disappear for another year!). I also did visual on both session and had with me my StarSeeker II 130mm f/5 on the first trip there and the 102mm f/10 refractor on the trip last weekend (24th of October 2014).

The wraiths of the cosmos


"NGC 6888 Crescent Nebula, Cygnus"

Coming back to topic. The main idea for these trips was to bag faint DSO's. I have not been successful in imaging the Eastern and Western Veil in Cygnus. The Eastern portion is much brighter and easier to image in comparison to the Western portion, the bit that goes through 52 Cygni!). I did give these objects a test run from my light polluted playground in Culver City. While the stacked images were swamped with noise (even with stacking of multiple subs), the nebulosity was clearly visible after post processing in PS. Encouraged by this I set out to re-image them from Solstice Canyon. As always the wraith like nebulosity was not visible on single exposures. I collected 20 subs of 30 seconds, both in FITS and TIFF format for stacking later.

Since I was in the Cygnus area, I decided to also shoot for the Crescent Nebula. This is another faint bubble that is borderline visible with narrowband filters visually. Again, much like the Veil Nebula nothing was visible on the single exposures. I took 20 subs of 30 seconds in both file formats to stack and play around with later.

The final dim object on my wish list was the Helix Nebula in Aquarius. This object, while not as dim as the previous objects, presented a challenge as it is a southern object and does not rise very high in the sky from Los Angeles. As such I had to deal with high background and noise, despite taking multiple exposures. Again I did 20 subs at 30 seconds each. I find in general this seems to be sufficient to bring out fainter nebulosity while improving signal to noise.

I also re imaged some of the challenging and fainter (but not as faint as the ones listed above) objects, even from suburbia. Redid M1, the Crab Nebula in Taurus and NGC 2023, the Flame Nebula in Orion. Both only required 15 subs at 30 seconds and were quite pretty with post-processing.

Preserving them for prosperity


"NGC 7293, Helix Planetary Nebula, Aquarius"

Speaking of post-processing, here is the current protocol I use. Open images in MaxIM DL and use the combine function. Select two stars for alignment (here you can discard images that are less than ideal) and then use the built in histogram function to get a decent image (not over exposed). Save the images as 16 bit TIFF images as PS cannot handle FITS (with the FITS images you have to use the combine color function to bring all channels into a single image (R-Red, G-Green, B-Blue, L-Luminence). I do all my post-processing manipulation in PS after doing the initial stacking of subs (6 up to 20 subs depending on object).

In PS, I use mainly the curves function to bring out faint nebulosity. I usually raise the the curve bit by bit. Then I use the Levels function to get the color balance and background to object ratio correct. The final product is then saved as two copies (don't forget to dark subtract too prior to manipulation), one in TIFF format and one in JPEG (to share on FB, Instagram, My Blog, etc.).

I was very pleased with the results I got. Let me know what you think of my images! Next change  (hopefully in the next few days), I will explore imaging from light polluted skies. Till then enjoy!


Wednesday, September 24, 2014

A week of glorious visual deep sky observing.....the skies under Gilroy

Dark is the Night for all.....

The last week (as of middle of August when I started writing this article!) was particularly memorable for me for many reasons, one being in NorCal for my wife's job interviews that went really really well, meaning we would probably be moving up to the bay area soonish. Secondly the glorious deep sky buffet that was served up nightly courtesy of the dark skies (orange bordering on yellow zone) over our friends place in Gilroy, known as the "garlic capital of the world". Gilroy is a nice little agricultural  town located about an hour and a half from SF and about 30 minutes drive from San Jose. It is the southernmost city in the Santa Clara County with a population of about 48,821 (2010 census). Due to its fairly rural location (with a surprising number of amenities), the skies are nice and light pollution free. Now I have been here many times to visit our close family friend, but have yet to take advantage of the skies up here. This time, seeing that we were going to be there for at least a week, I made sure I had the correct equipment for observing. I brought along my extremely portable deep sky scope, my Orion SkyScanner 100, a Paragon HDF2 photo tripod and my usual arsenal or accessories, 24.5mm Meade SWA, 13T6 Nagler, 6mm TV Radian, 20mm and 15mm Orion Expanse, and three deep sky filters, my Orion SkyGlow Broadband, DGM Optics NPB UHC and Celestron Baader OIII filter. My plan was to just do pure visual deep sky as I did not want the hassle of having to lug my tracking scope, laptop, batteries, etc for what could be very short stints out to rural dark skies rivaling perhaps Malibu. Turns out the skies here are darker than at Malibu! Views were spectacular towards the south. Light domes were evident over parts of the eastern and northeastern skies. The skies consistently got better after 12 midnight when people went to bed and shops shut for the night. The milky was thick and structured towards the center of our galaxy (Sagittarius-Scorpius region). This time of the year (mid August), the best time to view the center of our galaxy is just after astronomical twilight, which is about 9.30am PST. Even then, Scorpius was starting its slow decent down towards the horizon.
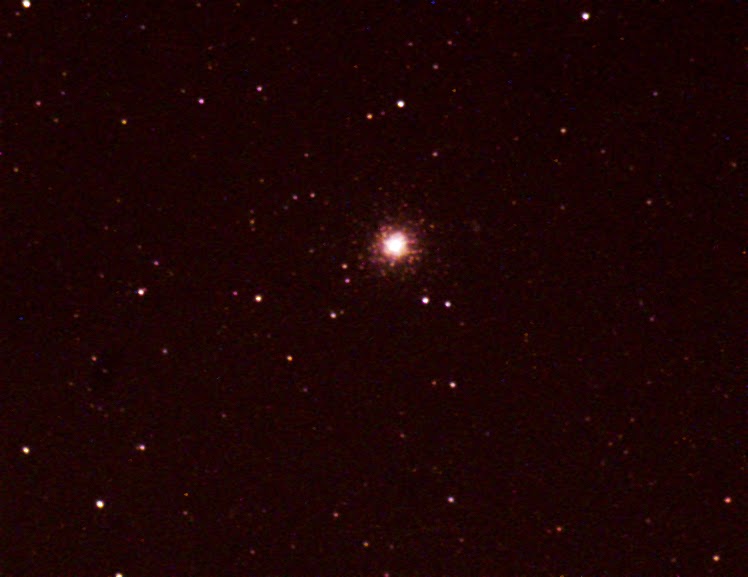
"M2 Globular in Aquarius"

My first two nights was spend observing just outside my friends house on the driveway. Battling light from nearby street lamps, I used my Walking Dead hoodie (sic) as a light shield. Even with the lights shining directly at me, I managed to shield my eyes enough to make out the North American Nebula and the Eastern (NGC 6690) and Western (NGC 6692) portions of the Veil Nebula in Cygnus, which was almost overhead by 10pm. Best views of these two came with the OIII filter. With this filter in place, and using the 24.5mm SWA, I could easily make out the shape of the North American Nebula, and also could recognize the Pelican Nebula! Sweet....

Over the course of the next few nights I would revisit the Veil Nebula. I usually start my scrutiny of the Veil by pointing my scope towards 52 Cygni. This area of the Veil is consistently harder to see as it is fainter. I could just make out the whispy nebulosity running through 52 Cygni with averted vision (the cigarette trailing smoke under night light effect). But as always the eastern portion of the veil showed more texture and mottling. This effect was even more pronounced with the OIII filter in place. I could not visually make out Pickering's Triangle, the middle triangular shaped nebulosity in the Veil. Best views I have ever had of the Veil (the entire complex was visible) was from Leyburn using my 10" f/5 dob and the DGM Optics NPB filter. The Veil looked like a photograph! To me that was the highlight of observing from rural skies. The Veil is not visible from urban skies even with the OIII filter in place.

Down globular alley...

Summertime is also prime hunting time for glorious globular clusters of all shapes and sizes. I visited some of the more notable globulars, that I go back to time and time again (all show some sort of resolution in smallish scopes). Past experience has shown me that in order to fully appreciate the diversity between different globulars, one has to use a minimum of 150mm (6") as it is at this aperture that even the run of the mill globulars start breaking out into stars at high magnification. However even with a small 4" scope, several globulars show partial resolution, and hence individual characteristics. Globulars that I recommend for small scopes include M22, the Crackerjack cluster in Sagittarius; M4 in Scorpius; M10 and M12 in Ophiuchus; M13 in Hercules and M71 in Sagitta. All of them look different under high magnification. There are several others worth looking at, but these appear as mere smudges with little or no resolution. these include M28 in Sagittarius, M15 in Pegasus and M2 in Aquarius.
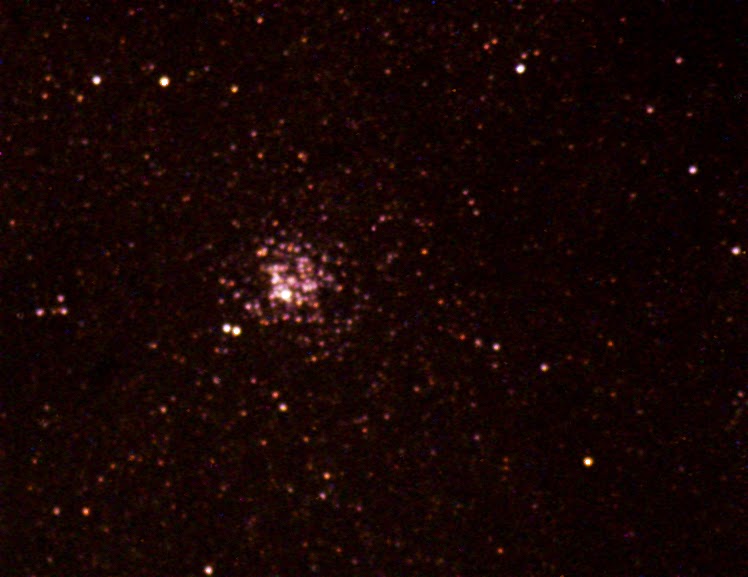

"M11 The Wild Duck cluster in the glorious Scutum area"

Many hail M13 in Hercules as the best globular for northern hemisphere observers. I beg to disagree. In my opinion, two globulars beat M13 to the punch, M22 in Sagittarius and M5 in Serpens. Both show more resolution in small scopes in comparison to M13. M22, my favourite northern sky globular would be rated more highly if it resided higher in the sky. Having observed this huge globular from the equator and from the southern hemisphere on multiple occasions, I am intimately familliar with it. M22 is very easy to find, being only a slightly to the right of the topmost star of the teapot cover. In my SkyScanner, at 67x magnification, the globular is nicely resolved (almost fully). Individual stars stream out of a very loose nuclear region. I can just about make out several dark lanes running through the globular. I sometimes compare this globular to Omega Centauri at low magnification from the southern hemisphere. Both appear very similar and look more like open clusters at very high magnification. There is almost no core as stars are resolved even at the heart of these globulars!

Two other globulars on my list that are also very loose include M4 and M71. Both are very easy to find. First look for Antares at the heart of the Scorpion. This ruddy star forms an almost vertical line with two other stars, to the top and bottom of Antares. M4 forms a shallow triangle to the right of Antares and the topmost star. As the individual stars in M4 have high horizontal branch magnitude, this globular is very easy to resolve. Scopes as small as 76mm can resolve the "bar of stars" crossing the heart of this cluster (one of the first globular clusters I ever resolved, the first being M22 in my 76mm Newtonian from my balcony back in Vincent Street, Indooroopilly, Australia). Because of this "bar" the cluster has been called the "Cat's Eye Cluster" as it looks distinctly like the slit in a cats eye. M71, located in the rich region in Sagitta looks more like a compact open cluster than a globular. This cluster, like M4 is also easy to resolve at high magnification.It is also ridiculously easy to find. Its located very close to the middle star in the constellation.
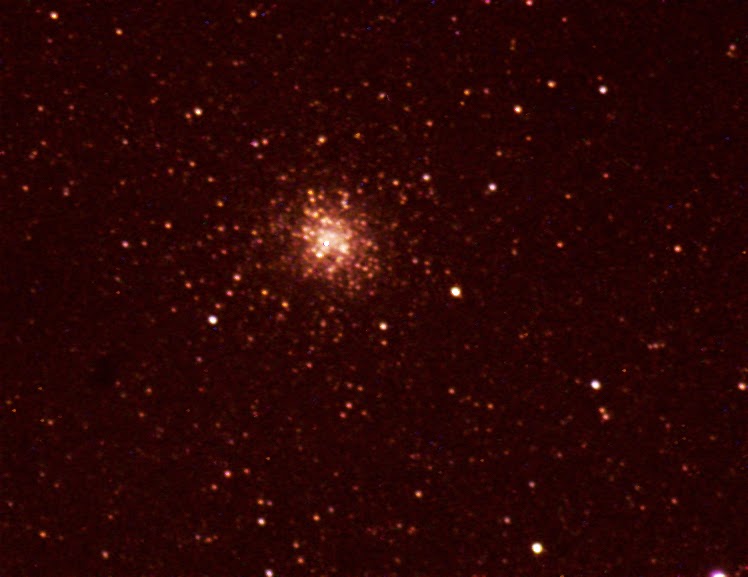
"The best northern globular IMHO. M22 The Crackerjack cluster in Sagittarius"

Moving north of the center of our galaxy, we come to the constellation of Ophiuchus, home to many Messier globulars of all shapes and sizes. The two most recognized clusters in this constellation are M10 and M12. Both can be readily distinguished from each other in small scopes as they show some semblence of resolution, although not on the level as the above-mentioned. Still they are rather bright and detailed as globular clusters go.

No survey of summer globulars would be complete without visiting the "so called" king of the northern globulars, M13 in Hercules. This too is extremely easy to locate. All one has to do is locate the keystone at the head of Hercules. Moving south of the topmost-right star of the keystone, you come upon a fuzzy star. M13 is tighter than M22 and M4 and shows a rather condensed core at low magnification. This illusion is shattered at high magnification. At 67x in my SkyScanner I can resolve stars from the periphery to the heart of the globular with averted vision, and can make out the propellar shape that the out-curving stars make (this feature is very prominent in scopes 6" and larger). Also like M22, I can just make out some dark lanes crisscrossing the globular.

Glorious ghostly wraiths.....

"M8 The Lagoon Nebula in Sagittarius, best seen in summer!"

With the warm dark nights in the northern hemisphere, the majestic northern milky way glows softly above, and the center of our galaxy hugging the southern skies its almost impossible to not heed the siren call of the night sky. The sky is peppered with globular clusters, pretty open clusters and some of the finest emission, dark nebulae and supernova remnants in the northern hemisphere. Two of these have already been mentioned. The best place to view such spectacular showpieces nebulae is Sagittarius. Looking towards the heart of our galaxy, in the Sagittarius-Scorpius region, one can just make out the celestial puff of smoke at the tip of the sprout of the teapot shape constellation with the naked eye. This is M8, the Lagoon Nebula, listed as one of the brightest star forming regions after the two top nebulae, Eta Carina, only visible to southern hemisphere observers, and M42, the great nebula in Orion. M8 looks best in a wide field scope as its nebulosity covers an expansive portion of the sky. In the SkyScanner, I can frame M8 and M20, The Trifid Nebula in a single FOV. I find using the UHC type filters counter intuitive from darker skies as it just darkens the views too much. The nebula looks the best framed by bright stars. To see detail however, its best to use magnifications of about 50x, with a UHC type filter. At such magnification, the dark lane that gives it the lagoon moniker comes alive. Dark lanes snake their way through bright nebulosity. Also the hourglass nebula is bright and clear at the heart of the brightest portion of the nebula.

The same can be said for the other bright emission nebulae that pepper the area around Sagittarius. To the north of M8, the delicate Trifid Nebula is also best seen at higher magnification, with the NPB filter. Under low magnification, all you can see is a faint fuzzball surrounding a double star. The dark lanes that give the Trifid its name is best seen at higher magnifications, with the NPB filter in place. A harder thing to spot is its reflection nebula component as this is not enhanced by line filters. For this purpose, I use the broadband filter. In fact from darker skies, sometimes I prefer using this filter over the narrowband filter as it does not affect the brightness of the stars too much.

"M20 The Trifid Nebula is frames nicely with M8 in RFTs"

Two of the remaining bright emission nebulae also look the best under medium to high magnification. M17, the Swan Nebula is one of my favourite nebulae due to its high surface brightness and the intricate detail it presents to curious eyes. This detail is visible even in small telescopes. The main body of the swan looks feathery in my 13T6 Nagler at 30x magnification. The head and neck regions are easy to make out, plus I always feel like I am looking at steam evaporating off the swan's back whenever I look at this object. In my larger scopes, the swans body looks distinctly mottled with brightness variations throughout the body. There is also added swirls of nebulosity behind the swan's main body. Its almost like the wake left in the water as the swan swims through its celestial pond. M16, the Eagle Nebula is harder to see in comparison to all the other nebulae mentioned so far. To the untrained eye, all one can see if the star cluster embedded in its soft swirls. On good transparent nights (such as the nights I had under Gilroy skies!), nebulosity is evident even without a narrowband filter. To me, the faint swirling nebulosity looks more like a ghost, much like how O'Meara describes it in his Deep Sky Companion Messier Objects guidebook. Its famous dark pillars of creation structures are only visible in the largest of scopes (I have seen it with direct vision through a SDM 30" scope at Leyburn and Camp Duckadang in Queensland, Australia!). Detail in this nebula is infinitely easier to detect using CCD imaging...even in scopes as small as 4".
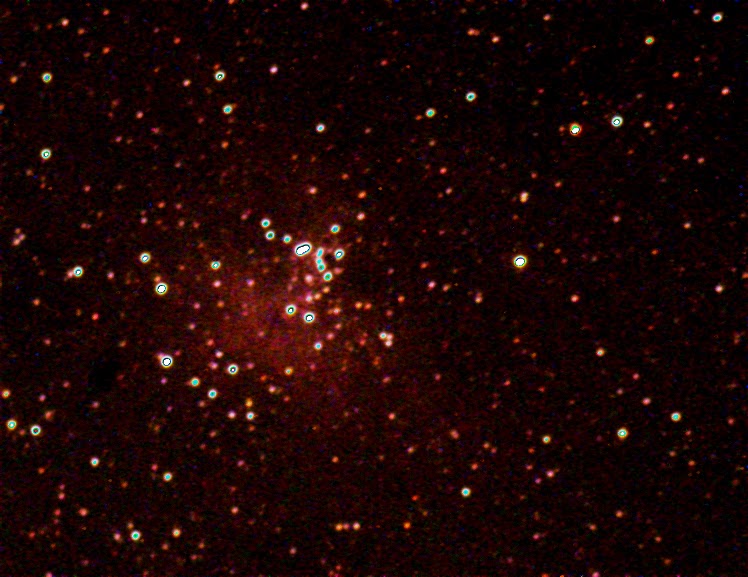
"M16 The Eagle Nebula in Serpens"

Yet another class of objects best seen under summer skies are also classified as nebulae, but rather than representing star birth, these celestial puffballs represent the graveyard of stars. Two of the best examples of planetary nebulae are represented. Everyone has seen and or at least heard of M57, the beautiful Ring Nebula in Lyra. This object is compact, with high surface brightness and therefore punches through light pollution. It also helps that it is one of the easier objects to find in the heavens, since it is located between the bottom two stars in the parallogram that makes up Lyra the harp. This beautiful celestial doughnut is pretty in the smallest scopes. The ring shape is clearly visible even in a 76mm scope. In my 100mm SkyScanner at 50x, I can already make out its ring visage. Under darker skies, a narrowband filter is not really required for a good view.


"M17 The Swan Nebula is just an awesome sight in small scopes. Sagittarius"

In contrast to tiny M57, the other planetary nebula, M27, in the rather obscure constellation of Vulpecula the fox is much larger, and therefore its light is spread out a little bit more. However it is bright enough to be visible form light polluted skies. This one benefits heaps from narrowband filters for light polluted locales. Under dark skies, this object is glorious, appearing more like a hollowed out apple...or and apple core. With the filter in place, its outer nebulosity is visible, making it appear more like a football in my 100mm SkyScanner. To locate this object, I use Sagitta's arrow like stars as a jumping off point. Neighbouriny Vulpecula make a upsidedown W with M27 just south of the middle star in this W shape asterism.

Islands in the stream


"No galaxy pics but then this is summer. M27 The Dumbbell Nebula in Vulpecula the fox"

Summer is not the best month to view galaxies since the thick dust around the center of our home island universe tends to obscure all but the brightest galaxies. This area of the sky is known as the "zone of avoidance". However if you observe early enough, or much later in the evening, you get to gaze at some of the best examples of objects in this class. Early in the evening, look to the north-western sky to spot the big dipper. While technically not in the constellation of Ursa Major, it is easiest to use this constellation as a jumping off point for starhopping. The galaxy I am referring to is M51, the famous Whirlpool Galaxy, another rather high surface brightness object. In fact it is so bright it is even visible in 10x50 binoculars as an oblong shaped smudge. In small scopes, such as my SkyScanner 100, its beautiful face on spiral nature is not visible. All I see is a more magnified odd looking pear shaped object, much like what is visible in binoculars. Spiral structure is hard to detect in scopes smaller than my C8. Use the las star at the end of the big dippers ladle to seek out this object.

The final area of the sky I surveyed is home to one of the brightest object in this class, M31, the Andromeda Galaxy, and its companions galaxies M32 and NGC205. This object is so bright it is easily visible with the naked eye even from less than perfect skies. Under Gilroy's semi rural sky, the galaxy was an easy naked eye catch, even though it was still languishing in the brighter area, with the light dome stretching upwards from the horizon. This galaxy is best seen with wide field scopes and binoculars since it spans a very wide area of the sky (6 full moons diameter). However to see details (i.e. the dark dust lanes), you need more magnification and a larger aperture (I have seen this feature in my C6!). The SkyScanner frames M31 nicely, with its spiral arms stretching out across the FOV. Both satellite galaxies are visible in the same FOV in the 24.5mm Meade SWA. As usual M32 appeared as an intense oval, while NGC 205 was more diffused and harder to pick out. The three form one of the best galaxy groups visible in small scopes, along with the likes of M81/M82, also in Ursa Major.
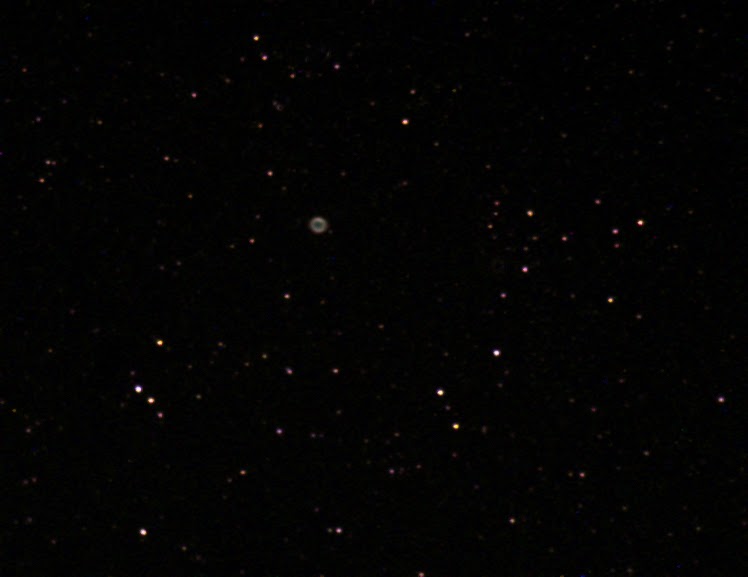
"Small but one of the prettiest. M57 The Ring Nebula in Lyra"

So that concludes my rural sky observing report. I must confess that I have not been keeping up with my reporting and that there were two more reports that should have been written up. As both were conducted under similar skies, I figured I write a very detailed report to substitute the other two. One session was from Mount Pinos where I had my C8/Vixen Porta Mount and Astroscan with me, a purely visual session, and the other just two weeks ago from Malibu. All images featured here were taken at Malibu with my widefield 70mm TravelScope mounted on the NexStar GT mount. Enjoy....


Friday, August 8, 2014

Book Reviews on telescopes. binoculars and deep sky objects....your gateway to knowledge Part 1

Star Ware 2nd, 3rd and 4th edition Author: Phil Harrington Publisher: John Wiley and Sons

 "StarWare 2nd and 3rd Editions"

If there was ever a bible on astronomical equipment, this would be it. While not a flashy book by any means (no color pics in this softbound book), there is so much information packed into one volume that it would take you a weeks to cull all the information offered in Phil's book from other sources. We are currently up to the 4th edition, and if you, like me like collecting books, you will probably end up getting all editions. What is cool about this is that you can follow the progression and evolution of the telescope scene, through the eyes of a well known astronomy writer (Phil writes for Astronomy Magazine and frequently does scope and accessory reviews). Times have changed quite a bit since the first book was published, and Phil takes note of this. For instance Phil discusses the proliferation of high quality telescopes from China and Taiwan (Mysteries of the Orient), formerly the source of poor quality beginner scopes. The entry of telescopes from Synta (China scope giant that took Celestron) and Guan Sheng (Taiwan) has greatly reduced the prices of scopes and truly brought scopes to the masses. This truly is the golden age for naturalist of the night sky.

The book begins by giving you a brief history of telescopes and binoculars, and then goes on to highlight binocular and the telescope types, and their pros and cons, after which he discusses mounting issues (alt-az versus equatorial). Then we dive deep into the different telescope types (split into the three main scope families: refractor, reflector and catadioptrics) and Phil spotlights the different brands and gives a mini review of sorts of the different telescopes. Phil use of his experience with telescopes over the years in his scope reviews for this book. While not as detailed as his writeups for Astronomy Magazine, the short reviews in Star Ware contains all the important information one needs to make an informed choice! Phil puts a cap on small scopes however and discusses scope larger than 70mm for refractors and 114mm for newtonian reflectors. His reasoning is that users will quickly lose interest using a scope smaller than that due to the lack of detail. In this day and age, it is also just better to start with a larger scope since prices are so competitive. Its not uncommon for people to start out with a 80mm refractor, like the ubiquitous Synta made Orion 80ST's (also sold by Celestron, just in a black tube as opposed to Orion's white) or a 4.5" EQ newtonian. It is also very evident that many of the major brands obtain their scopes from the same manufacturers and Phil highlights this fact (i.e. Celestron and Orion get their scopes from Synta in China). It is a very enjoyable read.

 "StarWare 4th Edition front and back"

Besides telescopes, Phil also covers binoculars, the same way he covers telescopes, by brand. Again his experience with a plethora of different equipment allows him to make very good comparisons between different brands. Here we see the same phenomenon, with different brands importing the same binoculars. Again the influx of higher quality product from the east has once again allowed end user to benefit. For instance, giant binoculars in the 70mm range, there were once out of the reach of most users due to price are now readily available. In the past, a beginner might start with a 7x50 or 10x50mm binoculars. These days its not uncommon to start with a 15x70mm binoculars. These are readily available from Oberwerks (they specialize in big binocs), Celestron and even Orion! Even BIG binocs such as the 25x100mm are easily affordable now. be warned though, for these monster 100mm binocs, you need a hefty mount to hold them up. They are not your average grab and go's! Buyers be warned though as some companies are more lax with their QC and have lower specs than other (i.e fully coated versus fully multi coated optics).

And if that is not enough, he also covers all manner of telescope accessories from filters for planetary and deep sky objects, CCD camera's down to observing vest and books! He even makes a recommendation list of eyepieces for beginner, intermediate and advanced observers. Yup nothing is left out. as I said before this is the definitive guide to accessories for the amateur astronomer. He caters to everyone, from the wet behind the ears newbies to amateurs who have been at it for years!!!!

Oh and yes there is more. There is the section for the homemade astronomer too. He highlights home projects such as observing chairs, binocular mounts, etc. An added plus with the older editions is an observing section at the end where Phil list several of his favourite objects and how to find them by star hopping. This section was so popular that it was later reformatted into a new book Star Watch. Overall this series is a MUST read and an awesome addition to your astronomy library.


Deep Sky Companion Series Stephen James O'Meara (Cambridge Press)
The Messier Objects
The Caldwell Objects
Hidden Treasures Treasures
The Secret Deep
Southern Gems 


The Deep Sky Companion book series by Stephen James O'Meara (published by Cambridge Press) remains as one of the best guidebooks on deep sky objects out there (besting perhaps Burnham's three volume Celestial Handbook, which I have used in the past, but do not own) . Each volume covers approximately 100 to 110 objects, most of them chosen by prolific observer Stephen O'Meara (with the exception of the Messier and Caldwell objects, which were selected by french comet hunter Charles Messier and veteran British astronomy popularizer Sir Patrick Caldwell Moore). It has come as no surprise that O'Meara would eventually author these books on visual deep sky observing, seeing that he has a keen eye for detail and has been called "the best planetary observer of modern times" (he was the first person to spot the spokes in Saturn's rings visually before they were confirmed by Voyager images). O'Meara also happens to live at one of the best places on earth for visual astronomy, high on the volcanic mountains at Volcano, Hawaii. Currently using a 5" TeleVue refractor on a rocksteady Gilbraltar mount, most of his observations for the earlier books were done through a 4" TV Genesis. All of his sketches are composites of many observing sessions under the stars with different magnifications. The features he see's through his scopes are only visible to patient observers using much larger scopes (in the 8" class as claimed). The secret here is good transparent skies, patience, liberal use of different magnification and good breathing technique (to suck in more faint photos, you need to supply heaps of oxygen to your brain). The introductory section of the book covers most of these, from the equipment he uses, to specific techniques to improve visual observation (hyperventilate, but not to the point of fainting!). he also makes note of how "vog" (volcanic smog) is acidic and eats away at lens coatings on his Genesis scope, and the legs on his Gibraltar mount. Poor Al Nagler had to deal with his beat up TV Genesis ;)

"Caldwell Objects front and back"

So how are the books themselves? I am a big fan on O'Meara's writing. He is a great author and draws you in as you read the text. You feel like an old friend is sitting beside you at the eyepiece, guiding you towards the object and telling you what there is to see. Each object is given individual attention (unless there is a pair of galaxies in the same area, etc) and covered in detail, from factual data (magnitude, apparent size, RA and Dec), to historical (quotes and notes from Charles Messier, William Herschel and James Dunlop) and astrophysical data (the latest information no less!). My favourite bit is the descriptive part of the prose where he guides you to the object via starhopping and then proceeds to wax lyrical about the shapes you see in the objects (some really whimsical...and he gives them nicknames too like the crackerjack cluster, M22, Hagrid's dragon, etc.) and what standout features you should look out for. His eyepiece impressions are also very impressive as he really takes time to drink in the faint starlight and put down his impressions on paper. He devotes an enormous amount of time to some of the more intricate objects, such as M42, Orion Nebula and the NGC 3372, Eta Carina Nebula in the southern hemisphere. This is what every visual observer should do, slowly but surely scrutinizing each and every single deep sky object they find, and then taking time to savor the views through different magnifications, before putting pencil to the paper. Too many observers these days go for sheer numbers. Its not about spotting objects and then moving on to the next, its about seeing as much detail as you can make out from that one dim grey fuzzy.

"Hidden Treasures front and back"

I am not sure which volume of his series is my favourite. There is a special place in my heart for the Messier Object volume, as it was his first book (and also the smallest volume I might add!). His writing style has evolved a bit over the course of his books. I prefer his first book over the others as it felt more personal and heartfelt. Maybe its because he added heaps more astrophysical data to the prose in his newer books! The rest of the book are all as voluminous as the Caldwell Objects. An added extra, O'Meara list an twenty extra objects that did not make the final cut for the book, that he felt were spectacular enough to warrant mention in his book. These come with a short prose, but do not have factual data, sketches or a small map.

"The Secret Deep front and back"


Any cons to these books? As mentioned these are not really books you want to carry into the field with you. They are hard cover books that are bound rather tightly and impossible to lay flat on a surface (to read you need to either press down on both sleeves of the book, or hold the pages open with two hands). The pages are also glossy and can be ruined by dew. You will also need a separate set of detailed maps for star hopping to locate these objects. The maps provided with the text are woefully inadequate. There are large scale maps on the inner flaps at the front and ends of the book show the rough location of the objects in relation to the constellations, and some smaller scale maps with each object. None of these go very deep in terms of magnitude. Also another "gripe" of mine is repeated objects in two of his books (that is why I got Southern Gems as a Kindle Book). I kinda guess that this would be the case since the Caldwell Object spotlights some of the best southern deep sky objects (and so does the Southern Gems book).

So for the budding deep sky observer, these series of books in a must read. Many experienced astronomers would also want this collection on their shelves.


Coming soon...more reviews......

Saturday, June 28, 2014

Astronomy Magazines.....your introduction to amateur astronomy

In an attempt to be more consistent with my blogs, I have decided to review not just telescopes and accessories, do writeups on my many dark sky trips, or how to articles on how to improve ones observing, but to also educate newbies on the currently available observing aids out there. These can be magazines, books, or even apps. What better way to kick off this new series of blogs by doing a spotlight on two of my favourite astronomy magazines, Astronomy and Sky and Telescope?

You want to know the best kept secret? Getting into amateur astronomy is not as hard as you think. Most people think the first stop is the library. In many aspects that it true. Beginner books are a great source of information. However another way to get into it, is via magazines. This is the way I got into the hobby all those years ago, picking up a copy of Astronomy at a local newsstand!!!!! There are many pluses to using magazines, one of which is that the content is the most current and up to date. Also monthly magazines feature monthly starmaps, which makes navigating the night sky easier (kinda like a monthly planisphere!), and also an almanac of events occurring in a that certain month. Other information such as planet rise and set times, sizes, moon phases, etc are also provided.

The two biggest magazines, and the ones I still follow to this day, are Astronomy and Sky and Telescope Magazine. Sure there are others such as SkyNews (Canada), Sky an Space (Australia), Astronomy Now (UK) and BBC's Sky At Night (UK). I have bought copies of these magazines in the past and they are all pretty good and serve observers in their respective countries. However in my opinion, the best of the best is still the original two, with BBC's Sky At Night coming in at a very close second!!!!

Astronomy magazine, based in Waukesha, Wisconsin was first conceived by Stephen J. Walther and was first published in August 1973. The first official Sky and Telescope Magazine, a merger between Hayden Planetariums "The Sky" publication and Perkins Observatory (Ohio) "The Telescope" saw daylight in 1941. Many magazines have come and gone. However these two have stood the test of time, and have even spawned several other shorter lived publications under their umbrella. One of my favourites was Deep Sky Magazine, which was the brainchild of Astronomy magazines current editor David J. Eicher, and Night Sky, a Sky and Telescope offshoot magazine aimed at wet behind the ears newbies. Deep Sky Magazine (from the Astronomy team) was ahead of its time in that it featured in depth articles on pushing the envelope with bigger telescopes and peering deeper into the universe (and it was choke full of eyepiece impressions of deep sky objects). Night Sky went the other way and featured back to basic articles on telescopes, etc, as well as simple star hops for novices. Both these publications will be missed.

The parent magazines have undergone massive changes over the years too, reflecting the current state of amateur astronomy. Its hard to say which one I like better. Both have their strengths and weaknesses. The main focus of the Astronomy magazine has always been astrophysics and cosmology (and this is still very evident till today). Whilst by no means my favourite topic, some of the articles gave deep insight into the inner workings of our universe. What I did love about the old Astronomy magazine was the spotlight on deep sky objects and other objects of interest grouped by constellation. Since I was a full hands on (or rather eyes on) amateur, I found this part the most interesting. I remember pouring over the information provided, the brilliant (by yesteryear standards) photographs, and David Eicher's pencil impressions of deep sky objects (this section was later resurrected in the late 2000's, but rather than going by constellations, they spotlighted two objects per month). These articles were later collected and published in a hardcover book form entitled "The Universe from Your Backyard". There were also extensive articles on deep sky objects, spotlighting planetary nebula, nebulae and other deep sky objects. These articles too were later collected into a hardcover book "Stars and Galaxies".

The Sky and Telescope of old focused more on amateur telescope making (ATM). Articles on observing was very limited. One notable from the Sky and Telescope of old though was Walter "Scotty" Houston's Deep Sky Wonder's column (yup it was a column in the beginning), which was also collected into a hardcover book, aptly named Deep Sky Wonder's. Scotty's column was short and sweet, and it challenged us to push the boundaries of our observing. This burden was later shouldered by Sue French, but by then the lil column had blossomed into a full on article. Still, I found Sky and Telescope to be lacking in articles on observing and deep sky objects (its slowly changing now and they have more articles on observing, with guest writers such as Ken Hewitt). What it lacked in articles on observing, it more than makes up with technical articles on telescopes, particularly "in-depth" reviews of telescopes and other assorted accessories such as eyepieces, barlows, filters etc. Don't get me wrong, Astronomy magazine does have their fair share of telescope reviews too (mostly from scope guru Phil Harrington of Star Ware fame). Its just every time I read a scope review from Astronomy, I was left wanting more. This was duly satisfied by the reviews provided by Sky and Telescope. In a way, you can say that both magazines exist in harmony and fill a particular niche. I for one found it very hard to choose between the two, and have, at some stages, bought both of them. So which magazine is the one for you. I say pick one and give it a go. If you were like me, you probably end up getting subscriptions to both, since they compliment each other so well (plus Astronomy has Stephen O"Meara writing for them, my all time favourite deep sky author). Oh and by the way, you now have the option of getting a digital subscription too. This makes reading this magazines a whole heap easier on mobile devices.

Next stop....deep sky observing book reviews....stay tuned.....